Friday, July 26, 2013

Signature Quilt

Hello!.  I hope everyone is having a good summer.  It's very rainy and hot here in Florida but the sun does come out once in a while

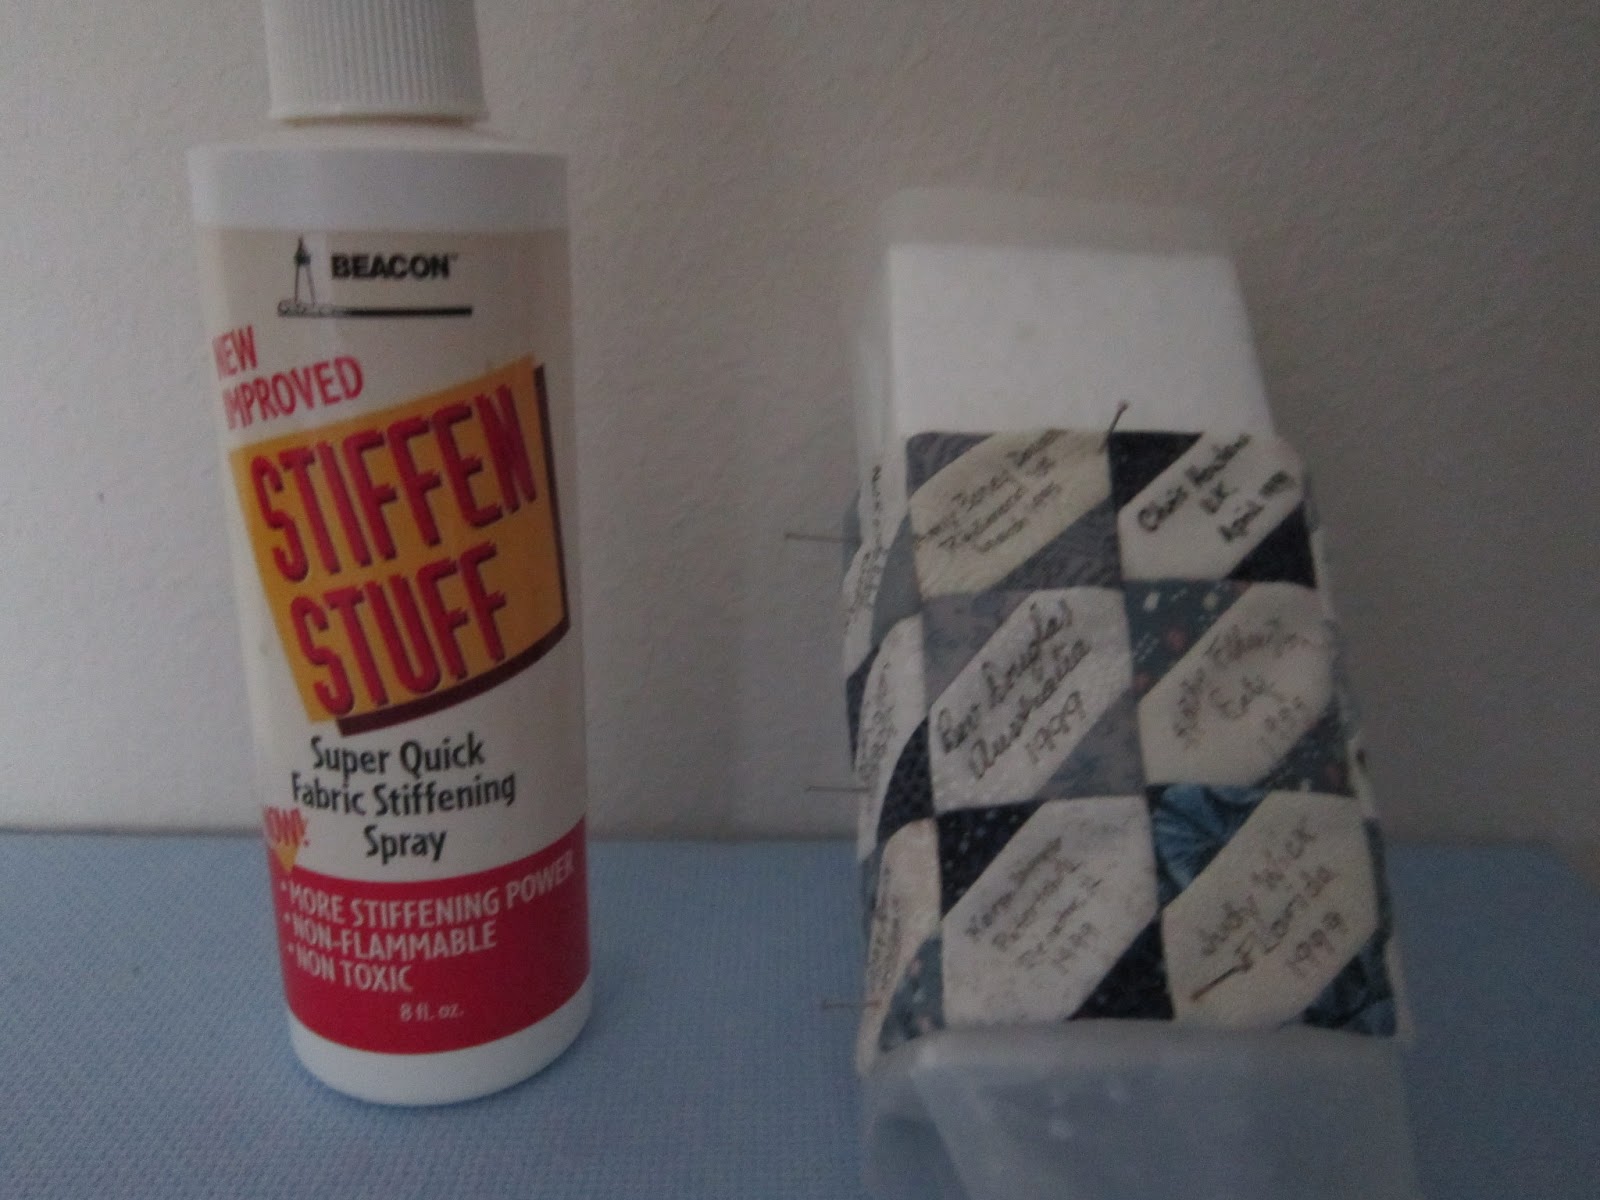
Does anyone out in "blogland" have one of these beautiful  quilts? It is from my first swap (AOL scale miniature group) from 1999! and one of my most cherished minis.  I know some of the signers are still around because I recognize some names.  If I  remember correctly, all swappers sent 3-4 squares of small print fabric to a miniaturist in Australia who offered to sew  then together for a quilt. We signed it with name, city, state/county and the year. And this is what we got in return.  I was so thrilled at how it turned out!  For many years it's just been laying on the bed in my lighthouse but the other day I decided to form it to the bed so it would lay more natural.


.
Now it you think this is an endorsement for Stiffen Stuff, you're right.

I also stiffened some bows for a more natural "hanging" look.  Just make sure that the pins are inside the loop hole and don't pierce the ribbon.  For the tails, cut them 1/2 longer than needed.  For these you will be piercing the ribbon.  When completely dry, just trim.


Well, this was just a short update as to what I've been up to since my last post.  Now, It's vacation time!  Til next time...
Diane

Thursday, July 11, 2013

Making curtains

What's this?  Another post so soon?..  I'm rather embarrassed that I forgot to mention in my last post that I am newly RETIRED!.  Have lots of spare time now.

I am nearly done with the construction part of my Fishing cabin but decided to take a break and start on making more accessories. I really wanted to start working with fabric so made some curtains and a valance. I don't know where this came from, but this method has been in the back of my mind for ages. Until now, none of my dollhouses needed curtains ( Flower shop, Wizards tower, Lighthouse or Bistro).  I am so very pleased at how these turned out that I will use the same method when I make drapes for my next dollhouse. As usual, I suggest you make a sample first.  Measurements are very important

You will need:

Styrofoam block covered with wax paper-not shown
Material- size depends on your window measurements.  Add a little extra for the width adjustment
Clamps- at least 3
Two pieces of very stiff wire- (one will be for the valance).  These will be your curtain rods
       Each of the wires will be different lengths, one for the curtain and one for the valance.  Cut them at least  2" longer than you need. You can trim the excess off later
Craft sticks- I use Skinny Sticks. They are only 6" long but 1/4" wide which makes them perfect for this
     project.
Fray-chek
Long needle with a very large eye
Stiffen Stuff- There is no chemical listing as to what this is made of, but I assume it's a form of liquid starch
     (don't take my word for it though).  I feel comfortable using it.  It comes in a pump spray bottle
* Optional-Trim- either fabric or a very thin ribbon.

You will be "weaving" the fabric over and under the craft sticks as this picture shows.  Be sure the very first stick and the very last stick are on the outside of the fabric.  We will be clamping the sticks together and you don't want to leave any imprints.

At this point, you just might want to just keep going, and going and going (adding more sticks) to cover the full width of you window. ( It's easy to cut in half to make 2 panels.)  Hopefully your clamps will expand wide enough but mine did not so I had to make 2 panels.   Make sure the fabric lays smoothly on the sticks and secure with clamps.

Now the fun part.  Instead of spraying the stiffener on, I took the cap off, held the styrofoam over a bowl and poured it on.  Worked much faster.  Let dry 24hrs.  When dry, gently remove the sticks.  Hold the curtains up to the window to see how much you need to trim off.  After trimming, apply Fray-chek..  This is what you should have.


Another fun part.  Take your needle and thread the curtain onto it, about 1/4" from the top.  The purpose of this is to make a hole that you can thread your wire through.  I had a little trouble with the holes closing up so I did have to clip 1 or 2 threads to make the hole wide enough.

*Optional- I took some ribbon and  wove it over and under the craft sticks just like I did the curtains and soaked it in Stiffen Stuff.  Now the trim is shaped the same and it's just a matter of gluing it to the curtains.

After all this work, this is what it should look like.  Now it's just a matter of bending the ends of the curtain rod to fit your window.  Whew!  This part is done.
For the Valance- I stitched a very narrow casing and threaded the wire though.  After gathering it as full as I wanted, I dunked it into Stiffen Stuff, let it dry and bent the wire
As soon as I'm ready to hang them up, I'll get another picture.


ABOUT BLOGGING

I really need some help here (pleading on bended knee) .  I'll try to explain my problems as best I can along with some questions.

First.  Is Google Reader (the one that has been discontinued) the same thing as Google Friends connect?

          Can people still become followers using Google Friends Connect or do I need a different gadget?

          ( I'm planning a giveaway this fall and am asking the participants to become followers)

Second.  I have Bloglovin and can read the blogs I follow from there.

               I can still read the blogs I follow off my Dashboard.

But when I view my blog, I noticed that over half of the blogs I follow are missing from my Blogroll.  How can I get them back?  Most are supported by Google but do I have to add them manually?

It's very stressful being so Blogger ignorant..  Any help is truly appreciated.

Well'  I'm off to "de-stress" my self and make some more minis

Til next time....
Diane


Saturday, June 29, 2013

Perforated paper

Long time, no post (again)!  I wish I had a lot more to show you but have only completed one or two projects.  I have been experimenting, trying to figure out how much this carpal tunnel thing is going to effect my minis. There are good days, bad days, but mostly in-between days.

I started out by making a simple picture frame out of perforated paper and it turned out ok.  It really looks better at a distance rather than close up so maybe not suitable for a frame.  Again, I apologize for the photo quality.


If you decide to try this, here are a few tips.

Make a sample or prototype first.  It may take extra time and waste some paper but you'll get an idea of what is involved in sizing.

Mount you printie from behind and not on top of the paper.  You will have to cut out the center of the paper to mount from behind but I think most of you will like it better.

Use 6 strands of floss for good coverage.

To save a little time, use a "half stitch"  for the sample.  If you like the sample well enough to use, you can always go back and finish it to make a "full' stitch.

Make 2 copies of you printie, just in case there's boo-boo.  BUT, before you cut them out, be sure to leave a 1/4" border.  This will help you maneuver the picture around until it's centered.  You will also need to apply a thin line of glue so trim the excess away very carefully.

BTW, I did this with my left hand and it took nearly twice as long as I thought it should.  The sad thing about this is that I don't know when or where I'll use it!

Now this next picture is of the fence I will be placing around the porch, just to add a little something extra.


Plain, simple, nothing special.  But this is were my second experiment came in. (Don't laugh too hard please!) I don't know what I did, but when I went to start painting all those little boards, my hand started to cramp a little and I found it "uncomfortable" to hold a paintbrush!  So I tried to paint with my left hand.  That was better but very slow and awkward.  Finally, I got rid of the paintbrush altogether and painted with my index finger.

WELCOME TO FINGERPAINTNG 101!

It worked beautifully!  No streaks, drips or fingerprints.  It was fast and even a little fun.  And it made no difference to me if I washed off my finger or a paintbrush. Kind of crazy but it worked!


Welcome to my new followers!  I hope you enjoy my blog and I really like comments and questions.
BTW, if  you have a blog and I am not a follower, please let me know!  I enjoy sharing and learning new things and really want to see "what you've been up to"

Till next time...
Diane


Wednesday, June 19, 2013

Bloglovin

I'm still here.  Trying to install Bloglovin since Google is making a major change to blogs July 1st


<a href="http://www.bloglovin.com/blog/7523725/?claim=y5dydx8qjxj">Follow my blog with Bloglovin</a>

Tuesday, May 7, 2013

Hello and good morning!  Welcome to my new followers!  I hope you enjoy my blog.

Sometimes, when I look and all the minis I have made since my last post, I think I've done quite well and at other times, think I could have done more.  I did plan a few days away from minis to clean up my yard and
get some sun.  But I'll show you a little of what I've accomplished

First, my needlepoint.  I made a bell pull that I will be using in my next dollhouse (Georgian) and really had fun making my own design.  Although the picture doesn't show it very well, it is of pink and burgundy roses.
It is 6" long and 3/8" wide and done on 22 ct cloth.  That is about the smallest count I can do right now.  Since I don't have any idea on what the size of a bellpull should be, I just guessed.


The other item is a table runner ( not quite done ) to be used on a tea cart I have while the two smaller pieces will be napkins.

Unfortunately, my next needlepoint project will take a little while.  Because I have.... Carpal Tunnel Syndrome!!!  (Nooooo!  I am a miniaturist and don't want it! )  Sigh. I had an idea last summer that I might have a problem when I went kayaking a lot.  At the end of the season, my thumbs and wrists were tender from paddling but when I stopped for the season  it went away.  I consider this a temporary setback so armed with Advil, I will do what I can.

In light of all this, I decided to concentrate on what I could do.  So I made some furniture for The Lighthouse at Gavin's Bay.  I've always wanted a chart table and chart holder and they turned out better than I expected.  Next, I printed of some "time zone" clocks ( the ones you may see at an airport where they list the times in London, Paris, New York, etc).  To make them stand out a little, I mounted them on tight coils of quilling paper. The last thing I worked on was printies.  Lots of books, games, magazine and childrens stuff.  That went well.  Next time I post I will have pictures

About printies... I really appreciate all the people who so unselfishly share their printies.  It's made a big difference for a lot of us.  So to all you  "printies people" out there, Thank you!

I hope you all are enjoying some good weather so until next time...take care!
Diane

Friday, April 19, 2013

Detachable roofs

Hello everyone!  I hope you're getting some nice spring weather.  It finally arrived here in my part of Florida and it's been great.  Took a few days off and went boating, beach combing and eating at some of our favorite outdoor restaurants.  Nothing like warmth and sunshine.

A while ago, there was a question on one of my Yahoo groups about making a dollhouse roof detachable.  After looking at the fishing cabin, I thought "why not give it a try"  And it worked!  First, I had to glue the roof supports together and position them in the attic using masking tape.  Then I glued the two roof pieces together.  For this, I brought out the "father" of all glues...EPOXY!  The roof pieces were so heavy that I didn't want to take the chance of them coming apart or shifting ( I'm out of wood glue and didn't trust craft glue.).  I had to hold the pieces in place for about 5 minutes until the epoxy was set and then, with the help of my hubby, taped them together until the epoxy cured.  After that, it was just a matter of applying epoxy to the top edge of the roof supports, setting the roof on top and letting everything cure.  I took off the masking tape and now have a... detachable roof!  Cool!


I have spent quite a bit of time reading blogs, surfing the web and doing general cleanup of my computer.  When I heard about this new blog, I was very interested in her projects and became a follower.   Although Mindy is just getting started, I really like what I see.  Stop by and take a look
http://sandycoveminiatures.blogspot.com/

Now, about my boo-boos.  I try not to think about them too much because I get irritated with myself.  I used scrapbook paper for flooring in my attic.  I though I had measured twice and cut once, but I must have cut a second time because it was about 1/8" short on one side.  I will be fixing this by attaching a baseboard all around the attic.
The second mistake took time to fix but turned out well.  I love texturing but in this case, I applied the texture all the way to the bottom edge of the wall.  ( I knew better but all my "knowing" left me when I started.)  When I tried to slide the wall into the groove in the base, it wouldn't fit.  Texturing made the wall too thick.  So out came my metal file, sandpaper and a craft knife.  Finally got it to fit and then touched everything up with paint.

My next project will be to cut and glue printies, mainly board games childrens' book and magazines.  I have lots so I better get started!

Til next time!
Diane

Sunday, March 31, 2013

Perforated paper

Hello and welcome to my ... redesigned blog!  I am very pleased with how it turned out and still have a little "tweaking"  to do so will be working on that the next few days.  I've wanted to make changes for quite a while now and  for the last 5-6 weeks have been surfing a lot of graphics websites.  So many beautiful designs!  When I came across this one from www.PlumroseLane.com , I just had to use it.  It had my name written all over it. Hope you enjoy it.

Getting re-acquainted with an old craft

While going through my box of floss (getting ready to begin Petitpoint),  I found something I haven't used in years.   Perforated paper.  As a kid, I used to make RL ornaments from a kit I had and they really turned out nice.


This first picture is from a swap from years ago.  The swapper also included a few blank pieces for me to try and chart my own design.  I used it instead for the peg board on the workbench in my lighthouse.

It 's bendable, easily shaped and has a certain sturdiness to it.  It is 14 ct and comes in a variety of colors
It can be used for picture frames, rugs, baskets, wall hangings and even a doggie bed.  Combine all that with a variety of stitches, and I imagine the list can go on and on.  This is what I'm making my "welcome" mat out of.  I have not been able to find it in any craft stores but it is available on Ebay.

If anyone has other suggestions on things to make, please leave a comment.

Since my last post, I have had to take a few days off from minis to attend to my RL spring house cleaning and some yard work  Not my favorite thing to do.  But the sun is out and it's getting warmer so I think I,m pretty well over the winter blahs.

Til Next time!
Diane